
How to Install an Electric Facial Spa Bed

Table of Contents
- Learn the Basics of Installing An Electric Facial Massage Bed
- Items You Might Need During the Installation
- Step by Step Electric Facial Massage Bed Installation Guide
- Step 1: Consult a Professional
- Step 2: Look for a Manual
- Step 3: General Steps for Installation
- Common Troubleshooting Tips for Beginners
Looks like you have purchased an electric facial massage bed and have no idea how to set it up? In that case, you’re definitely in the right place.
In this guide, we’ll help you set up your new electric massage bed. But before we proceed further, please understand that every electric facial massage bed is different. We don't know which one you have, so we have decided to write down general instructions that can at least set you on the right path.
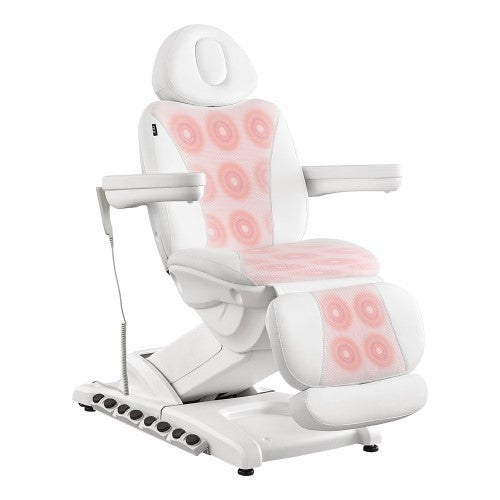
Learn the Basics of Installing An Electric Facial Massage Bed

- Backrest: Upper part where the client's back rests
- Handrest: Armrests or side supports for the client's arms
- Seat Cushion: Main cushioning on which the client sits or lies down
- Bracket: Metal supports to hold various parts together
- Long Bar & Short Bar: Metal bars used in structure for extra support
- Transformer: Converts electricity to power up the bed
- Control Board: The main hub for all electronic controls
- Power Plug: Connects the bed to the electricity source
- Bracket Support: Additional support for brackets
- Washer, Cotter Pin, Clevis Pin, T-Bar: Various mini hardware pieces used in assembly
Items You Might Need During the Installation

- Wrench
- Rubber Mallet
- Screwdriver
- Sturdy box
- Measuring Tape (Optional)
- Level (Optional)
Step by Step Electric Facial Massage Bed Installation Guide

Step 1: Consult a Professional
Even though we’re trying our best to help you out, sometimes it’s about experience. Are you that person who can’t even use a screwdriver or fix those bolts? Please try calling a professional before this turns out into a mess.
If you can install your facial bed in an hour or so, an expert might do it within 20 minutes. Plus, perfection matters!
Step 2: Look for a Manual
Just in case you still want to go down the DIY road, Google is your best friend. But remember, having no manual is better than relying on the wrong one. After all, every facial massage bed has its own set of instructions for installation.
There are chances you might not be able to find your manual on Google, so ask the customer care service to mail you one.
Step 3: General Steps for Installation
Not able to find a manual? You have two choices, how about calling an expert? If your answer is no, then all you can do is go through these general instructions.
Setting Up Your New Facial Massage Electric Bed
#1 - Be Prepared
- Open the box and see if you have all the parts
- Pick a location for the bed, making sure to keep it close to outlets as well as the overall layout of your space
- Clean that area where you will be placing the bed
#2 - Make the Bottom Section
- Take out the bottom part (called as base) and place it on the floor
- Secure legs or wheels to this piece which can be secured with a screw or a bolt
- Make sure everything is tight and secure
#3 - Put On the Top Section
- Lay the top section (the frame) on top of the base
- Secure frame through base with screws
#4 - Connect Wires
- Find wires or motors inside the box
- Make sure anything plugged in is securely placed to avoid any mishappening
#5 - Attach Soft Parts
- Put the mattress on the bed's frame
- If you have other soft parts, include cushions, armrests, or headrest
#6 - Level it Up
- Use a tool to see if levels are okay or not
- If you notice something is not right, adjust legs or wheels
#7 - Plug it In
- Does electric info on the bed match the wall outlet?
- Power the bed up into an electrical outlet if it does
#8 - Test it Out
- Turn the bed on and try all of its buttons and features
- Make sure everything is working properly
#9 - Double Check
- Get down to check that everything is tightly packed
- Make sure it's stable enough to carry weight
That’s it, you have successfully set up your new electric facial massage bed. If there's a warranty, register it as soon as possible. This would save you in bad times.
Common Troubleshooting Tips for Beginners
Power Connectivity Problems
Are your electric components properly connected and the power plug is plugged into a working outlet? If it is and this still doesn’t solve your problem, go through the manual again.
Bracket or Bar Alignment Problems
Putting the brackets in the right holes can be tough. Loosen screws slightly and align them correctly. Once it’s adjusted, tight it up again to get that perfection. Levelling can help you ensure that all sides are aligned perfectly.
Backrest or Seat Cushion Are Not Stable
All hardware pieces like washers, cotter pins, and clevis pins need to be tight enough to keep your backrest or seat cushion stable.
Dealing with Functional Controls
If the control board or remote has failed despite all connections between two components are okay, check the troubleshooting section in manual or call customer service at the manufacturer for more help.